Workbench Attributes
Menu > Workbench > Attributes
Use this page to pass invoice- and line-level custom attribute values to Determination. The most common uses of custom attributes are setting limited-use exemption criteria and triggering TransEditor conditions and actions.
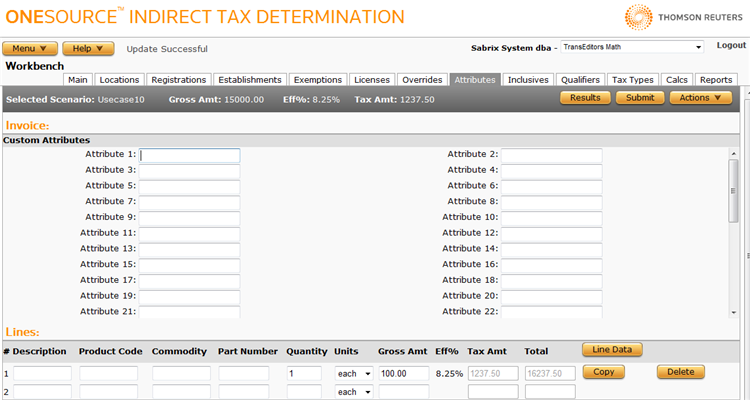
In addition to passing invoice- and line-level custom attributes, you can view calculation details and XML data, and export a scenario.
|
Workbench Attributes Field Reference |
|
|---|---|
|
Attribute1-n or (Attribute Name) |
The attribute number or name of the attribute for which you are setting a value. |
|
Attribute Value |
A value for the associated attribute. |
Pass an invoice-level attribute value
- Enter the value next to the desired attribute name or number.
- Repeat for as many attributes as you want to populate.
- Click Submit to save the attributes.
Pass a line-level attribute value
- Click the Line Data button if necessary. This button does not appear if you are already in line configuration mode.
- Select the desired line by choosing a number from the Line menu. If you need to see details about a line, you can toggle back and forth by clicking the Line Items and Line Data buttons.
- Enter the value next to the desired attribute name or number.
- Repeat for as many attributes as you want to populate.
- Click Submit to save the attributes.
View XML data
- Navigate to the Actions menu.
- Select XML Input, Allocated XML Input, Filtered XML Input, or XML Output. For more information, see Viewing Workbench XML Data.
View calculation details
- Click Submit to save your scenario.
- Click Results in the Selected Scenario section.
Export a scenario
You can export the selected scenario, or all scenarios associated with this company:
- Select Properties from the Actions menu.
- Click one of the following:
- This Scenario to export only the selected scenario.
- This Scenario and All Siblings to export the selected scenario and all other scenarios associated with the selected company.
- Click Save.
- Browse to or enter a filename to save to and click Save.
Once you save the file, you can re-import it. See the Importing Data page.